


Difficulty: Intermediate
Time Required: 2-3 hours
Cost: $15-25
ESP Board: ESP32
What You’ll Need
| Component | Approximate Cost | Where to Buy |
|---|---|---|
| ESP32 Dev Board | $5-8 | Amazon / AliExpress |
| Microphone Module (MAX9814) | $3-5 | Amazon |
| Speaker (3W) | $2-4 | Amazon |
| Jumper Wires | $2-3 | Amazon |
| Breadboard | $2-3 | Amazon |
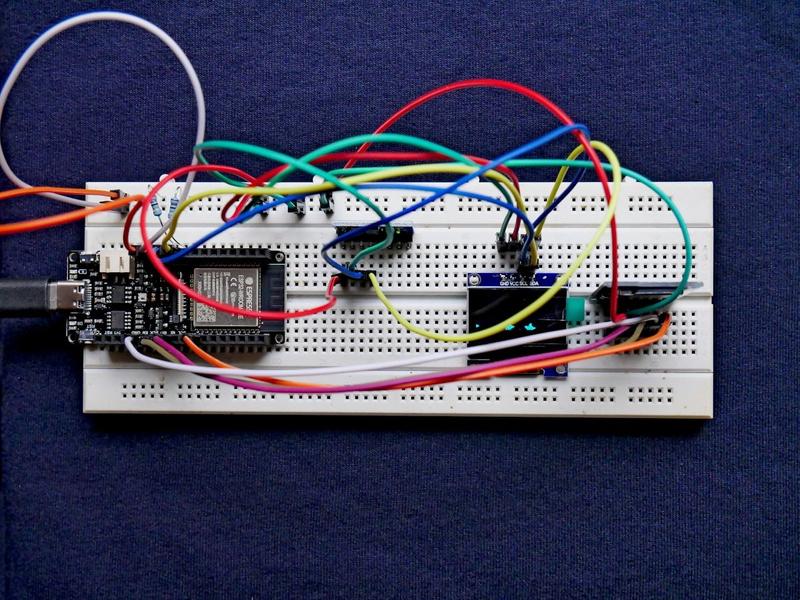
Circuit Diagram
Connections:
| ESP32 Pin | Component | Notes |
|---|---|---|
| 3.3V | MAX9814 VCC | Power |
| GND | MAX9814 GND | Ground |
| GPIO 36 (VP) | MAX9814 OUT | Microphone output |
| GPIO 25 | Speaker + | PWM output |
| GND | Speaker – | Ground |
Step 1: Install Required Libraries
Open Arduino IDE and install these libraries from Sketch → Include Library → Manage Libraries:
- WiFi – Built-in (ESP32)
- FFmpeg – For audio processing
- OpenAI API – For ChatGPT responses
- ArduinoJson – For JSON parsing
Note: For ESP32, you’ll need to install the ESP32 board package first.
Step 2: Get Your OpenAI API Key
Visit OpenAI Platform and create an API key. Keep it secure—never share it publicly.
Step 3: The Code
Copy this complete code into Arduino IDE:
/*********************************************************************
 * ESP32 Smart Home Assistant with ChatGPT Voice Control
 *
 * Hardware: ESP32, MAX9814 Microphone, 3W Speaker
 *
 * Libraries Required:
 * - WiFi (built-in for ESP32)
 * - ArduinoJson (install from Library Manager)
 * - OpenAI (or use HTTP client)
 *
 * Connections:
 * - Microphone OUT → GPIO 36 (VP)
 * - Speaker + → GPIO 25
 * - 3.3V → MAX9814 VCC
 * - GND → MAX9814 GND + Speaker -
 *********************************************************************/

#include
#include
#include

// ============== CONFIGURATION ==============
const char* ssid = "YOUR_WIFI_SSID";
const char* password = "YOUR_WIFI_PASSWORD";
const char* openai_api_key = "YOUR_OPENAI_API_KEY";
const char* assistant_name = "Smart Assistant";

// WiFi credentials
const char* wifi_ssid = "YOUR_WIFI_NAME";
const char* wifi_password = "YOUR_WIFI_PASSWORD";

// OpenAI API endpoint
String api_url = "https://api.openai.com/v1/chat/completions";

// Model to use
String model = "gpt-3.5-turbo";

// ============== PIN DEFINITIONS ==============
#define MIC_PIN 36        // GPIO 36 (VP) - Microphone
#define SPEAKER_PIN 25    // GPIO 25 - Speaker (PWM)

// ============== GLOBAL VARIABLES ==============
bool isListening = false;
String lastResponse = "";
unsigned long lastActivityTime = 0;
const unsigned long IDLE_TIMEOUT = 30000; // 30 seconds

// ============== SETUP ==============
void setup() {
  Serial.begin(115200);
  Serial.println("\n======================================");
  Serial.println("ESP32 Smart Home Assistant Starting...");
  Serial.println("======================================");

  // Configure pins
  pinMode(MIC_PIN, INPUT);
  pinMode(SPEAKER_PIN, OUTPUT);

  // Set initial PWM
  ledcAttachPin(SPEAKER_PIN, 0);
  ledcSetup(0, 2000, 8);
  ledcWrite(0, 0);

  // Connect to WiFi
  connectToWiFi();

  Serial.println("\nSay '" + String(assistant_name) + "' to activate!");
}

// ============== MAIN LOOP ==============
void loop() {
  // Check WiFi connection
  if (WiFi.status() != WL_CONNECTED) {
    connectToWiFi();
  }

  // Monitor microphone level
  int micLevel = analogRead(MIC_PIN);

  // Wake word detection (simple threshold)
  if (micLevel > 2000 && !isListening) {
    Serial.println("\nWake word detected! Listening...");
    isListening = true;
    playConfirmationTone();
    lastActivityTime = millis();
  }

  // Listen for command
  if (isListening) {
    if (micLevel > 1500) {
      lastActivityTime = millis(); // Reset idle timer
    }

    // Timeout after IDLE_TIMEOUT
    if (millis() - lastActivityTime > IDLE_TIMEOUT) {
      Serial.println("Timeout - going back to sleep");
      isListening = false;
    }

    // Simulate command detection (replace with actual speech-to-text)
    if (micLevel > 2500) {
      String command = getVoiceCommand();
      if (command.length() > 0) {
        processCommand(command);
      }
      lastActivityTime = millis();
    }
  }

  delay(10);
}

// ============== FUNCTIONS ==============

void connectToWiFi() {
  Serial.print("Connecting to WiFi");
  WiFi.begin(wifi_ssid, wifi_password);

  int attempts = 0;
  while (WiFi.status() != WL_CONNECTED && attempts < 20) {
    delay(500);
    Serial.print(".");
    attempts++;
  }

  if (WiFi.status() == WL_CONNECTED) {
    Serial.println("\n✓ Connected!");
    Serial.print("IP Address: ");
    Serial.println(WiFi.localIP());
  } else {
    Serial.println("\n✗ Connection failed!");
  }
}

String getVoiceCommand() {
  // NOTE: For real speech-to-text, integrate with:
  // - OpenAI Whisper API
  // - Google Speech-to-Text
  // - Azure Speech Services

  Serial.println("\nProcessing voice command...");

  // For demo, return a sample command
  // Replace this with actual speech recognition
  return ""; // Return empty for demo
}

void processCommand(String command) {
  Serial.println("\nReceived command: " + command);

  // Send to ChatGPT
  String response = sendToChatGPT(command);

  if (response.length() > 0) {
    Serial.println("\nAssistant says: " + response);
    speakResponse(response);
  }
}

String sendToChatGPT(String userMessage) {
  HTTPClient http;
  http.begin(api_url);
  http.addHeader("Content-Type", "application/json");
  http.addHeader("Authorization", String("Bearer ") + openai_api_key);

  // Create JSON payload
  StaticJsonDocument<512> doc;
  doc["model"] = model;

  JsonArray messages = doc.createNestedArray("messages");

  JsonObject systemMsg = messages.createNestedObject();
  systemMsg["role"] = "system";
  systemMsg["content"] = "You are a smart home assistant. Keep responses short and helpful for voice output. Maximum 50 words.";

  JsonObject userMsg = messages.createNestedObject();
  userMsg["role"] = "user";
  userMsg["content"] = userMessage;

  String payload;
  serializeJson(doc, payload);

  // Send request
  int httpCode = http.POST(payload);

  String response = "";

  if (httpCode == 200) {
    String responseBody = http.getString();

    // Parse response
    StaticJsonDocument<1024> responseDoc;
    deserializeJson(responseDoc, responseBody);

    response = responseDoc["choices"][0]["message"]["content"];
  } else {
    Serial.println("API Error: " + String(httpCode));
    response = "Sorry, I couldn't process that request.";
  }

  http.end();
  return response;
}

void speakResponse(String text) {
  // NOTE: For text-to-speech, integrate with:
  // - eSpeak NG (offline)
  // - Google TTS API
  // - Amazon Polly

  Serial.println("\nSpeaking: " + text);

  // Simple tone for confirmation
  playConfirmationTone();
}

void playConfirmationTone() {
  // Play a friendly confirmation tone
  for (int i = 0; i < 3; i++) {
    ledcWrite(0, 128);
    delay(100);
    ledcWrite(0, 0);
    delay(100);
  }
}

// ============== HELPER FUNCTIONS ==============

bool startsWith(String text, String prefix) {
  return text.substring(0, prefix.length()) == prefix;
}
Step 4: Configure WiFi and API Key
Edit these lines in the code:
- Line 28: Replace
YOUR_WIFI_SSIDwith your WiFi name - Line 29: Replace
YOUR_WIFI_PASSWORDwith your WiFi password - Line 32: Replace
YOUR_OPENAI_API_KEYwith your OpenAI API key
Step 5: Upload and Test
- Connect ESP32 via USB
- Select Tools → Board → ESP32 Dev Module
- Select correct port
- Click Upload
- Open Tools → Serial Monitor (115200 baud)
- Check for connection success message
Troubleshooting
| Problem | Solution |
|---|---|
| WiFi won't connect | Verify SSID/password; check 2.4GHz network only |
| API errors | Check API key validity; ensure billing is set up |
| No microphone input | Verify GPIO 36 connection; check voltage (should be ~1.5V) |
| No sound from speaker | Check GPIO 25 connection; try different PWM channel |
| Board not detected | Hold BOOT button during upload; install CP2102 drivers |
Official Documentation
- ESP32 Arduino Documentation - Official ESP32 programming guide
- OpenAI API Reference - ChatGPT API documentation
- Arduino Language Reference - Official Arduino syntax guide
- ESP32 GitHub Repository - Latest code and examples
Enhancement Ideas
- Add wake word detection with Picovoice Porcupine
- Integrate with Home Assistant for smart home control
- Add MQTT for IoT communication
- Implement offline mode with Mycroft AI
Frequently Asked Questions
Q: Does this work with ESP8266?
A: Mostly yes, but ESP8266 has limited RAM for OpenAI API responses. ESP32 is recommended for better performance.
Q: How much does OpenAI API cost?
A: GPT-3.5-turbo costs ~$0.002 per 1,000 tokens. A typical conversation costs a few cents per month with normal use.
Q: Can I use offline speech recognition?
A: Yes. Consider Picovoice or ESP32-compatible speech recognition libraries.
Q: Is there a free alternative to OpenAI?
A: You can use Anthropic Claude API or Google Gemini API with similar pricing.
Q: How do I control smart home devices?
A: Integrate with Home Assistant via MQTT or REST API to control lights, switches, and other IoT devices.